Star Trek Enterprise DIY Mei Tai

I've been excited about sewing and excited about babywearing but now that I've combined the two I'm on top of the world. Just not on top of the laundry pile.
This is not really a tutorial. A good chunk of this project I made by following the Barefoot and Pregnant Tutorial. It's very well written and covers every detail.
This post is just my way of showing my personal flair. I didn't want to chop up a wrap or use upholstery fabric or canvas for my baby carrier so used what I knew. I started with quilters cotton. I know what you're thinking "Quilters Cotton! You can't use that! It's not safe!" and you're right! This printed quilters cotton is purely decorative and just covering my support fabric. My strong fabric of choice is 100% linen. I picked black and bought 2.5 yards on sale for $8.49/yard. If you want to learn more about safe and strong fabrics for babywearing please read Jan Andrea's fabric FAQ's for sewing baby carriers. She also has several tutorials you should read if you wish to sew a baby carrier of any kind.
Note: This is my very first time writing a blog or anything else for the public to view so I hope I have given proper credit and linked things correctly.
Safety Note: I made this carrier for me to use with my own kids. If I do something wrong and my baby gets hurt it will be my fault. If you make a baby carrier and make a mistake and your baby gets hurt it will be your fault. So please do a lot of reading and thinking before starting your project. This is my very first DIY Mei Tai so I'm bound to make mistakes. Right now I feel comfortable using it with my 7 month old 18.5 lbs baby. I'm not sure yet that I would trust it for my 33lbs 3 year old. Maybe? We'll see...
1. My decorative fabric was white. Baby products and the color white rarely work out so I was determined to dye it. After lots of research I found a safe dye for baby carriers called Dylon. Your baby will suck on it so please don't use anything that can be sucked off of the fabric.

2. Jo-Ann Fabric only had China Blue in stock. I didn't think it would be dark enough but was eager to get started so I bought it. The fabric turned out as advertised but it was to pale for me. So I order more online, this time I dyed it Bahama Blue. I threw in a nursing tank top for me and a onesie for baby as well. No photo here but it was much brighter.

3. I made Padded-to-Wrap-Straps from the Barefoot and Pregnant Tutorial. My fabric was 2.5 yards of 100% linen and the bolt was 54" wide. After washing, drying, and ironing, I cut it in half down the length and then in half down one length again. My two straps ended up 86.5 inches (after washing and hemming) which is plenty long for me. This allows me to tie several different ways to relieve pressure points.

4. The straps are 11.25 inches wide. A little wider would have been nicer but then I would have had to buy twice as much fabric. This is 100% linen. I've used 100% linen in several ring slings and it's strong and gets really soft after a short breaking in. It does wrinkle easily though.

5. I wasn't sure how my decorative fabric would hang without being quilted to the linen so I sewed a few stitches here and there to one of my layers of linen. I hid the stitches in the starship enterprise graphics.

6. No new fangled machine for me. This is my Mom's old sewing machine which she received as a wedding gift in 1980. Here I am sewing a decorative stitch down one rail of the wrap straps.

7. Blue arrows. I just figured out how to do this today. I've never even turned that top dial before. I didn't know what I was missing! The blue arrows are decorative and I like to have my two rails look different from each other so I know if I've flipped my wrap when I pass it behind my back. They also remind me of the Starfleet uniform badge. I've discovered with these padded-to-wrap-straps it doesn't really matter if they get flipped.

8. I sewed my hood together according to the Barefoot and Pregnant Tutorial.

9. The hood strap is already in place, I am just sewing along the edge to hold it steady. Be sure not to sew through the hood strap or you won't be able to bunch it up later. This saves having to thread it later.

10. Completed hood.

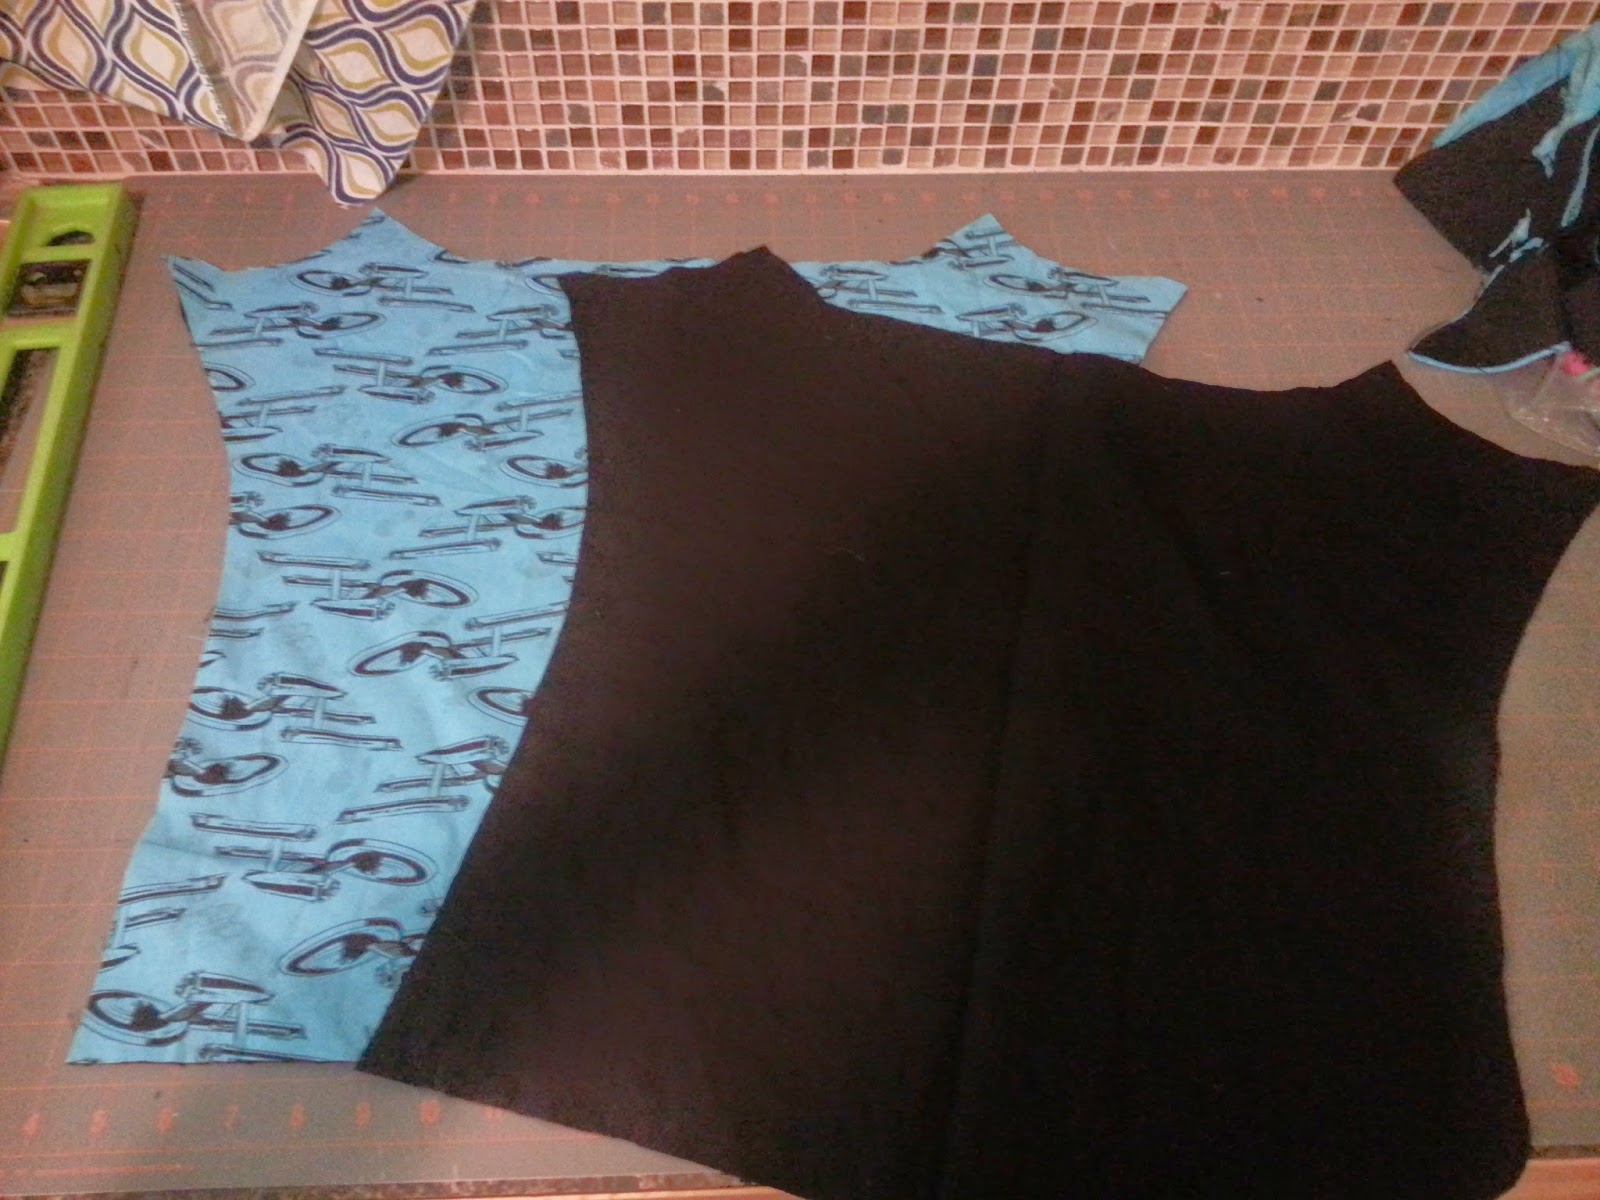
11. I cut out the body. This is upside down. I'm right handed and it's easier for me to follow the curve if I turn the fabric this way. Or maybe it's coincidence, I could have done it either way. This is one of the two Linen panels. The one I quilted to the decorative fabric.

12. I cut out the second linen panel. The top half of my body panel follows the Barefoot and Pregnant Tutorial while the bottom is just a standard apron waist 18" wide.
13. I started to make my fabric sandwich. I chickened out and pulled out the waist straps before sewing it together. I'm pretty sure it wouldn't have worked out. I sewed the sandwich together stopping just above the waist straps. Then after turning it right side out and ironing I put them back, pinned and top stitched. The straps you see sticking out the bottom are the shoulder wrap straps. The bottom does not get stitched at this time and sticking them through the bottom prevents me from having to tall of a sandwich. Does that make sense?

14. Sorry for no sewing photos here but I got excited and sewing this together only took a about 10 minutes. I spent longer top stitching twice around the entire body. I only top stitched once over the part behind baby's head because the padding was thick and I had to hand crank that part. after top stitching I sewed my reinforcing boxes. These are often called "X" boxes but I do spiral boxes because they are prettier. See photo #17 for a close up.
Here is my completed project with baby in a front carry. The straps could have been spread out a little more on my back but I rarely do front carries anymore unless I'm nursing and have nowhere to sit. My son here is 7 months old and 18.5 lbs.

15. Front carry with hood bunched and hood straps tucked inside. This makes wrapping the shoulder straps easier as the hood straps don't get in the way.

16. DONE! The wrap straps are 86" long and 11.5 inches wide. 13-14 inches wide would be better but more expensive. My Linen was a 54" bolt so If you got a wider fabric you could easily do wider straps without buying more yardage. The waist straps are cut to 40" and sewn in apron style. This is super long for me but I wanted to make sure it could fit my husband or anyone else who might borrow this someday. I didn't use a tutorial for the waist but sort of copied a "Kozy" brand carrier that I had borrowed from my local babywearing group, Babywearing International of Kitsap Peninsula.

17. Here is a close up of my spiral boxes. You MUST have reinforcing stitching or your straps could fall out and drop your baby without warning. Always use a quality thread. I use Gutterman. I used a matching blue thread on the spool and black in the bobbin so the blue wouldn't show on the inside of the body panel.

18. Hood down

19. Flipped over. Now you can sort-of see the padding at the neck. I stitched it to the inside panel before sandwiching and sewing the whole thing together. I didn't want the stitching to show on the outside. Not sure if you can tell here but I did a straight stitch to hold the little padding in place then a zig-zag around the perimeter to make sure it stayed put. This is all in the super awesome and helpful tutorial from Barefoot and Pregnant.

20. Action shot with hood up. I'm just holding the hood straps because I haven't added a loop on the shoulders to tie them to yet.

21. Action Shot Front view. The extra long straps hang to my waist. This is my current version of a Tibetan knotless finish. I should probably look this up again because I think I'm missing a step here.


23. Action Shot back view. He likes having at least one arm out but after he snuggles in a bit I like to untie the straps and get both arms in. It's more comfortable that way. If I have a friend around they can put his arm in for me so I don't have to untie the shoulder straps.

24. Happy Baby, Happy Momma!

25. I tried it with my 4 year old! He is 35 lbs and is definitely to big for this to be comfortable for him. The fabric does not support his knees or come up high enough on his back. That being said if we were out hiking and he got tired and needed to be carried I will still put him in this to carry him rather than carry him without a carrier. It is definitely strong enough just not ideal. I rarely wear him for longer than it takes for an attitude adjustment anymore so comfort is not our priority for him. He loves to be worn but often only needs it for a few minutes before he feels better and is ready to be down again. Although we weren't smiling in this photo we were both pretty happy with this.
Tip: the wrap straps can be spread out under his thighs a bit to support his legs more than the body panel alone.

No comments:
Post a Comment